Rebecca Cotzec
  • What I Do
  • How I Think
  • Thoughts and Insights
  • Lets Connect
What I Do
How I Think
Thoughts and Insights
Lets Connect
Rebecca Cotzec
  • What I Do
  • How I Think
  • Thoughts and Insights
  • Lets Connect
Browsing Tag
halloween
Beauty

Halloween Nail Art How To: Simple Spider

October 28, 2014 No Comments
Halloween nail art how to simple spider, rebecca cotzec

Halloween nail art how to simple spider, rebecca cotzec

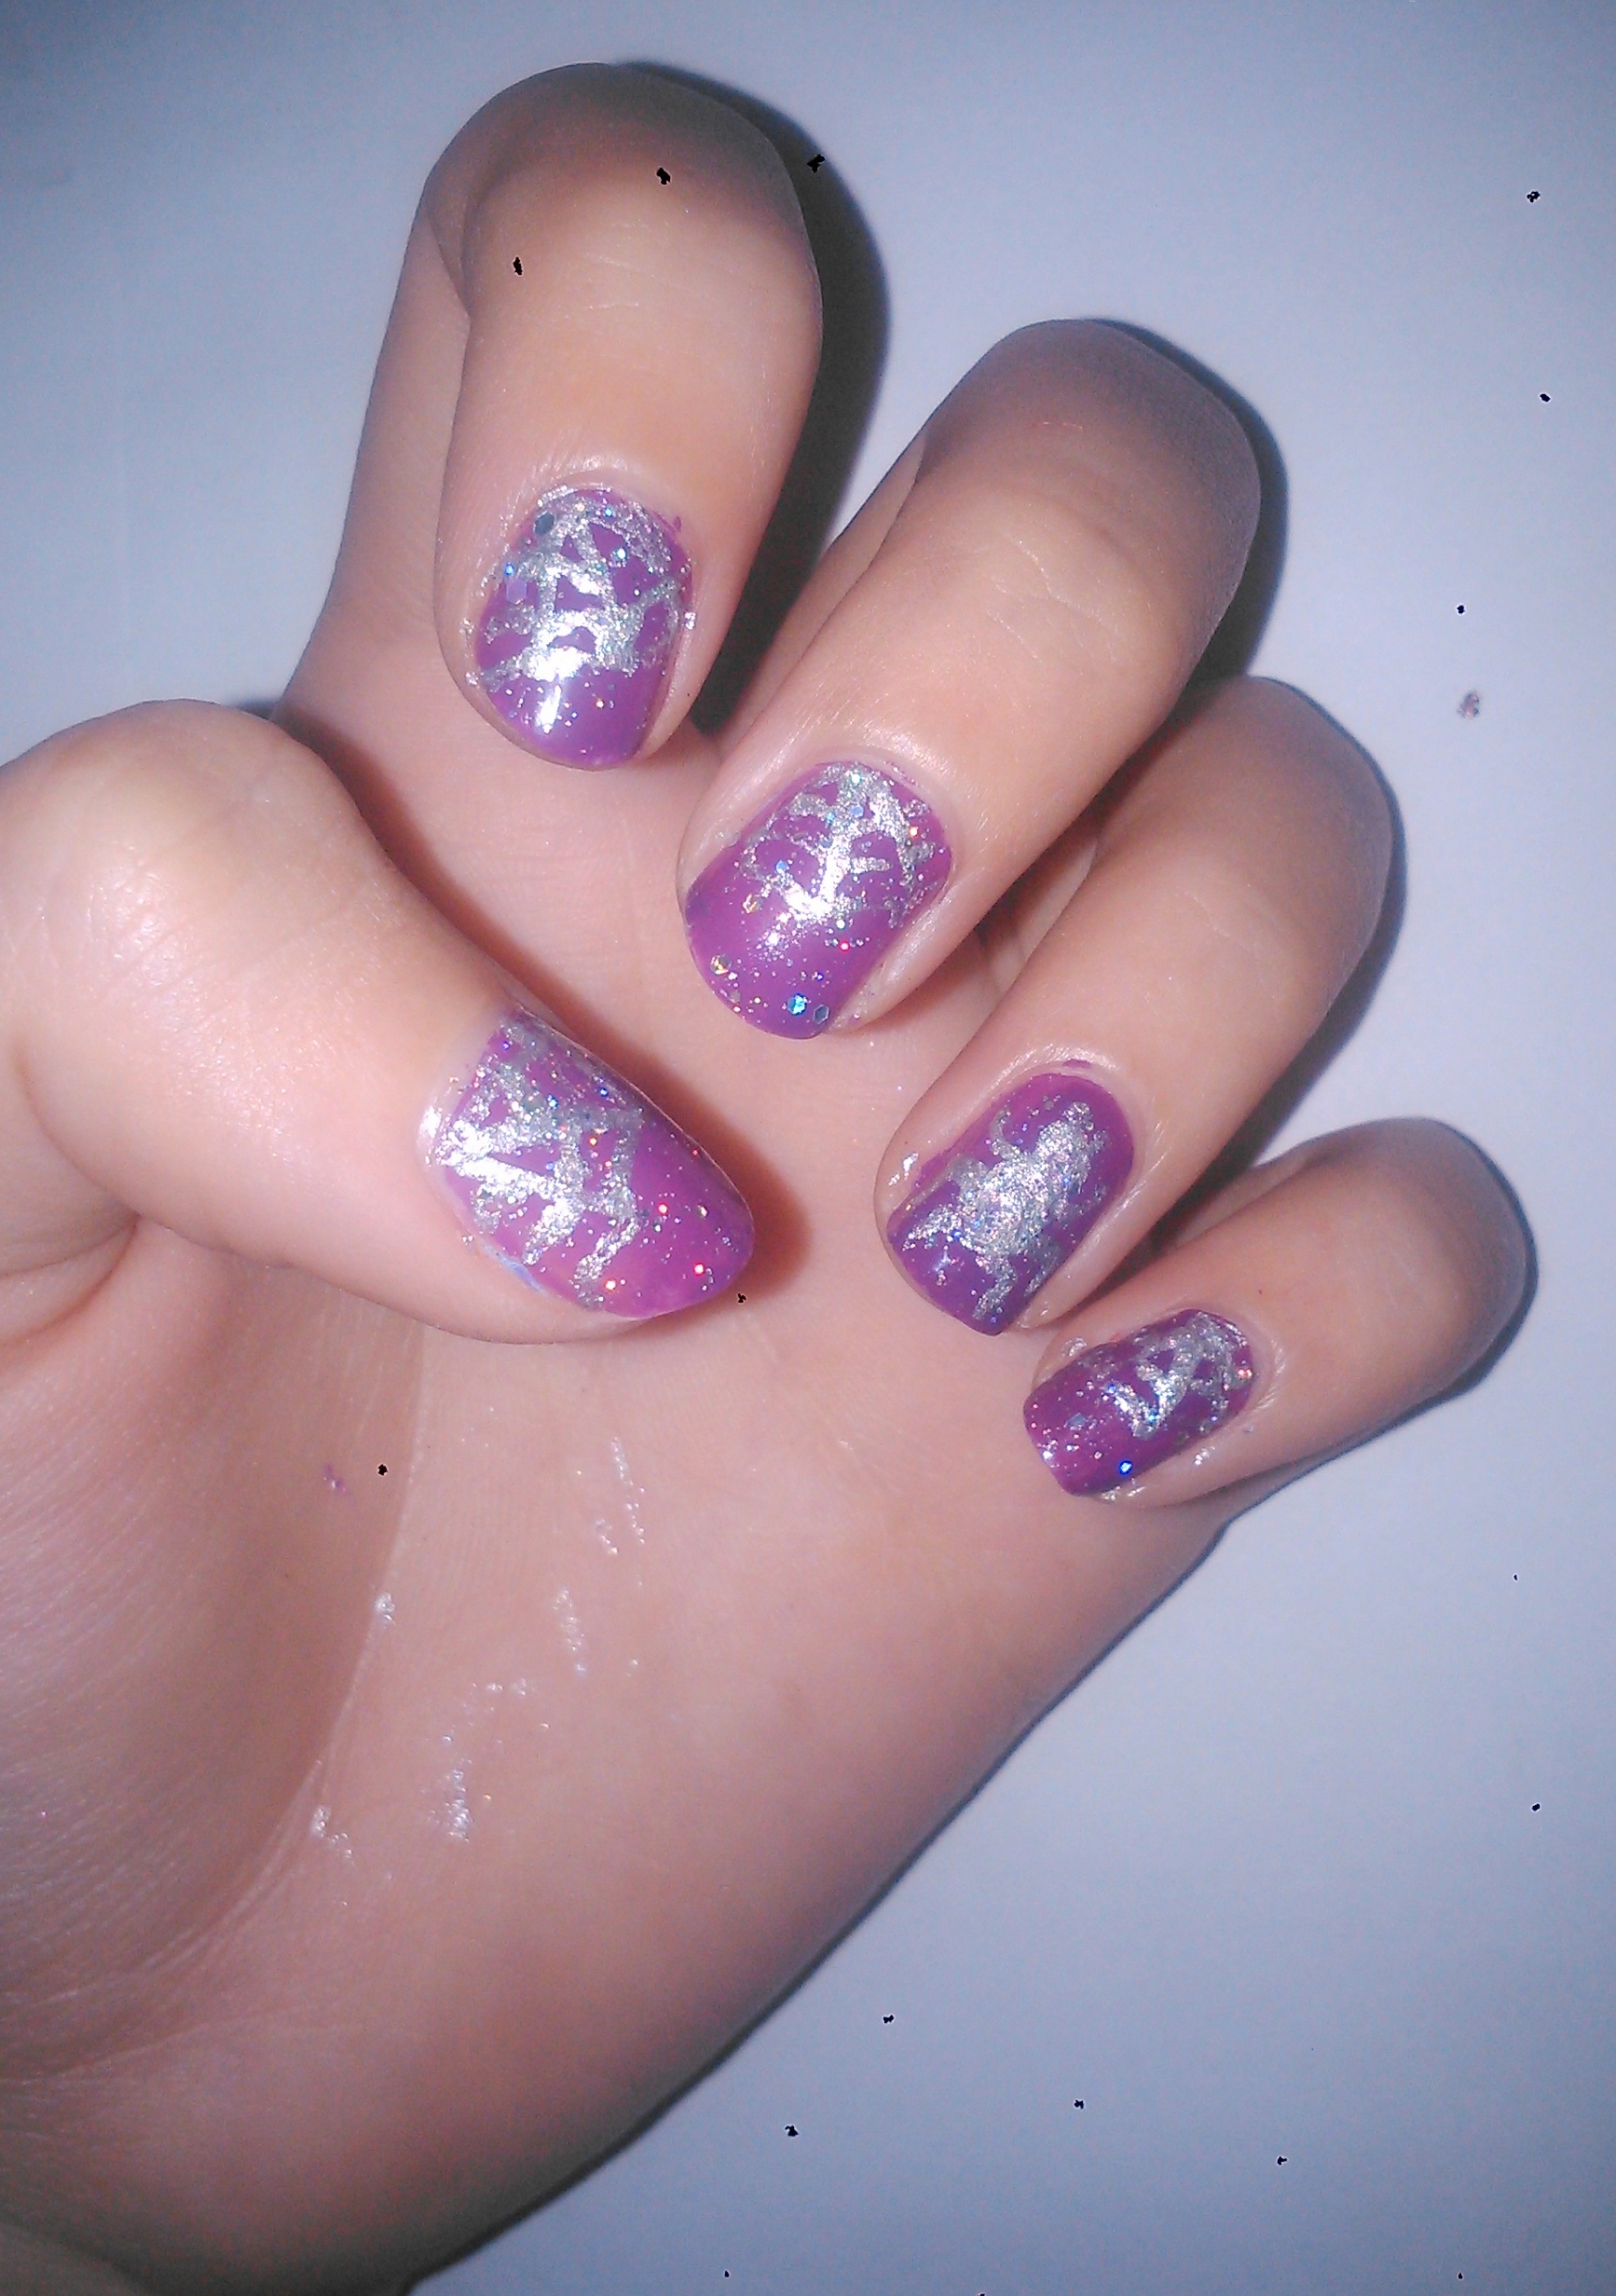
Super simple and fast to do, this is a perfect manicure if you’re a beginner or don’t have time to create intricate Halloween nail art. For this look I have used Barry M’s bright purple as the base, an old unbranded silver nail polish and Barry M’s Diamond Glitter nail polish as a top coat .

First apply an even base coat in the bright purple. I love this nail polish, probably because the colour reminds me of Cadbury chocolate. Yum.

Once this has dried, use a dotting tool, nail art pen or cocktail stick to draw on three distinct lines. Try to get them all to originate from the same point, or as close as you can get, and flare outwards at an angle. This will form the basis of the web. You could have the starting point of the web at any place on the nail; however it makes more sense to me to place it into a top corner. I’ve chosen the ‘outer corner’ so that my webs are reaching inwards – as you will see in the photos.

Halloween Nail art how to, simple spider, rebecca cotzec

The second part of this Halloween nail art, is to add in the horizontal webbing (is that what it’s called?) on the web. Do you have webbing on a web? Who knows?

You can see on this photo what I mean. The lines here look a bit thick, and if you are worried about them merging into a silvery mass, just carry on. You can define them later by adding purple in where the ‘gaps’ would be.

Halloween nail art how to spider, rebeccacotzec

In the photo I have only completed one section but you need to carry on filling in the sections until the web is attached, so to speak, to each side of the nail.

I did these webs on four fingers, but felt that for Halloween nail art, it just needed something else to give it an edge.

As such, on my ring finger I created the spider. To do this, make a small circle ¾ of the way up the nail. This will be the head of the spider, and every head needs a body. So, make a larger oval attached to the head and add on one leg at a time. Try to give the legs a bit of a bend in them, rather than just sticking out straight.

Halloween Nail art how to, simple spider, rebecca cotzec

For a final touch to the spider, add two small stubs to the head to act as pincers.

Cover in glittery top coat and you are done!

Halloween nail art how to simple spider, rebecca cotzec

Told you it was quick!

Continue reading
Reading time: 2 min
Written by: support
Beauty

Halloween Nail Art How To: Haunted Forest

October 23, 2014 No Comments
Halloween nail art how to haunted forest

Halloween nail art how to haunted forest

If Edgar Allen Poe indulged in nail art, this would have to be his signature style. Spooky, subtle and hints of decaying glamour… The perfect Halloween nail art idea if you’ve still got to work on the day.

To create this Haunted Forest nail art look, I first applied the base coat of Collection’s Work the Colour in the shade Going for Gold. I was highly excited at trying out this colour as I have long been looking for a gold nail polish that is a clean metallic and not full of glitter.

It took two coats, but as you can see on the nails of my glamour assistant (aka The Mother) it gives a really nice coverage.

Halloween Nail Art How To Collection Going For Gold Nail Polish

Once the gold has dried, it’s time to start on the design.

I started by sketching a tree trunk onto the ring finger. Use a dotting tool, black nail art pen, or cocktail stick to draw a crooked thin line, from the tip of the nail up three quarters of the nail. Then starting from the bottom, slowly make it thicker, as you can see from my photo it is a good idea to try and make the line get thicker towards the tip to the nail like a tree trunk reaching down to the ground. Try to make it crooked, as this is Halloween nail art, and all sinister trees are crooked, are they not?

Halloween Nail Art How To Rimmel 60 second dry

For the ground of the haunted forest, I’ve just painted a black line. Then swiftly moved on to the fun bit of adding the branches to the tree. I’ve tried to keep them quite thin, however in some areas they do get a bit thick.

After adding the ‘main branches’ I’ve just painted on shorter off shoots from them. All of the black polish that I’ve used is part of Rimmel’s 60 Seconds  collection – which I think is perfect for nail art because of how quickly it dries.

On all other fingers (excluding the thumb) I have only put on one branch, using the same method. On the little finger I have created it in a more swirled shape, and on the other two fingers I have one going up and one going down. I was trying to give them the impression that they was slowly growing and creeping – smothering anything it their path. A bit like the thorns in Disney’s Sleeping Beauty.

Halloween Nail Art How To Haunted Forest

There’s always an excuse for a Disney pic, right?

For the thumb, I felt the need to do something a bit different. So I drew a horizontal line (thicker at one end than at the other) to act as a branch, then added on a large circle. On top of this I added a smaller circle and triangle to act like a beak (can you tell what it is yet?)

Halloween nail art how to

Halloween nail art how to raven

After asked if it was a cat (and reverting back to a pre-school child for a moment) I added on two wing shapes… and voila, a raven appeared.

For a final touch I added some thorn like off shoots to the branch.

Halloween nail art how to haunted forest

Halloween nail art how to haunted forest

I hope you liked this tutorial, and that it made sense!

Continue reading
Reading time: 2 min
Written by: support

About me

I’m Rebecca—a social media strategist and copywriter with a background in brand storytelling and digital marketing. Currently open to roles that value clarity, creativity, and results.

  • LinkedIn

    © 2018 copyright PREMIUMCODING // All rights reserved
    Designed by Premiumcoding